Drypoint etching... and painting techniques.
In Printmaking, I had a chance to try drypoint technique.
Linocutting makes thick, graphic lines, and often looks quite rustic.
Drypoint is more delicate, like a fineliner pen.
- I chose a drawing from my sketchbook and laid the acetate over it. Using a drypoint tool (a wooden tool with a needle at the end) I traced the drawing, replicating all my hand-drawn lines, but after that I began to add details -- especially cross-hatching for the shaded areas.
- I smeared a little ink onto the plate; then, using a ball of cheesecloth called a scrim, I worked the ink into the grooves. I followed this by wiping off the excess ink on the unetched areas.
- I floated some cartridge paper in water to remove the starch and make it pliable.
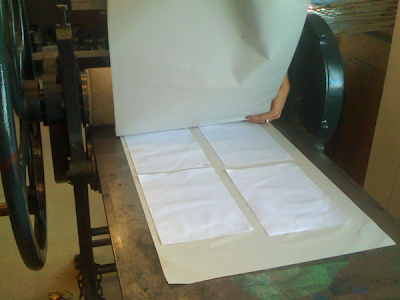
- I put the inked plate onto the bed of the intaglio press and placed the softened cartridge paper on top. This was covered in big blank sheets of newspaper and two soft felt blankets. Then I turned the handle, moving the roller over everything.
- Afterwards, I peeled off the layers of covering to reveal my etching.
 |
| 1. Quite murky because I left a lot of excess ink on the acetate. |
 |
| 3. Trying to get a crisp line. I wiped off a bit too much of the ink! |
Homework:
Choose whether you'd prefer your final project to be in linocut or drypoint.
Make another original drawing which you'd like to develop into your final print.
Select two of these artists and research their etching work to get inspiration: William Hogarth, Albrecht Dürer, Tracy Emin, Paula Rego.
Fine Art
* Painting techniques: learned about the different methods for applying paint.
* Making black: by mixing all three primary colours, learnt how you can create many subtle tones of black to harmonise with the colours in the rest of a painting.
* Mark-making: experimenting with lots of different items (sticks, sponges, branches) to see what marks they can make on paper. Then using some of those methods to create an artistic response to an item. (I painted some teazles.)
Homework: Research painter Terry Frost to discover more about mixing black, also look at Robert Ryan and Ad Rheinhardt.
Research the work of John Piper to learn more about mark-making, also look at two more artists who use pure mark-making.


I like your chicken, and I also like your first one best; the excess ink really adds to the finished image and makes it more of an original work. If the plate is too clean drypoint images look a bit dull and flat. Jealous of you doing printmaking! I've not had a chance to do any for years.
ReplyDeleteThis is what I'm learning, my final piece for this taster course is quite clean and dull, I'd love to try and make a version with more inky character.
ReplyDeleteYes, I've been thinking, 'I love doing this now, but where on earth am I going to get hold of a printing press after this course?!' Better make the most of it.
I love your chicken! Can I buy one?
ReplyDeleteHi Joe, thank you for asking! I've handed in the plate as part of my assignment, but when I get it back, I'm going to run off a couple more for my neighbour. You can certainly buy one, we can do it through Etsy.com.
ReplyDelete